Amazon Macie Guide: Discover & Protect Sensitive Data on AWS
Introduction
In today’s data-driven world, organizations often store vast amounts of sensitive information in the cloud. Keeping track of where personal data, financial records, or secret keys reside – and ensuring they’re properly secured – can be a daunting task. This is where Amazon Macie comes in. Amazon Macie is a fully managed AWS service that leverages machine learning and pattern matching to automatically discover and protect sensitive data in your Amazon S3 buckets. In this Amazon Macie guide, we’ll explore what Amazon Macie is, how to get started with it, how to use its key features to secure your data, and how Amazon Macie pricing works.
What is Amazon Macie?
Amazon Macie is a cloud-based data security and privacy service provided by AWS. At its core, Macie scans data in Amazon Simple Storage Service (Amazon S3) and automatically identifies sensitive information such as personally identifiable information (PII), financial data (like credit card numbers), AWS secret keys, and more. It uses a combination of machine learning and pattern matching to recognize sensitive data at scale, giving you visibility into where your sensitive information lives and how it’s being protected. Macie doesn’t just scan data; it also checks your S3 bucket configurations and alerts you to potential risks. For example, if a bucket becomes publicly accessible or misconfigured, Macie will generate a security finding so you can take action.
In simpler terms, Amazon Macie acts like an automated data security auditor for S3: it builds an inventory of your S3 buckets, monitors their security settings, and inspects the objects within for sensitive content. All of this happens continuously and behind the scenes once Macie is enabled. Macie’s fully managed nature means you don’t have to deploy servers or update machine learning models – AWS handles the heavy lifting. Your job is to review Macie’s findings and use them to improve your data protection posture.
Key benefits of Amazon Macie include continuous monitoring and discovery at scale, simplified setup (it can be enabled with a single click or API call), and multi-account support via AWS Organizations (you can enable Macie across all your AWS accounts centrally). Macie comes with a growing list of managed data identifiers for common sensitive data types (names, addresses, credit card numbers, etc.), and it also allows you to define custom data types using regular expressions for patterns unique to your business (for example, employee ID formats). In the next sections, we’ll dive into how to set up Amazon Macie and make use of these capabilities.
Key Features and Capabilities of Amazon Macie
Amazon Macie offers several powerful features to help you discover, monitor, and protect sensitive data in S3:
- Automated Sensitive Data Discovery: Once Macie is enabled, it can automatically and continually analyze objects across your S3 estate for sensitive data. Macie employs intelligent sampling techniques to assess a representative subset of your data, building a sensitive data profile for each bucket . This results in an interactive data heat map in the Macie console that shows which buckets are likely to contain sensitive information (with buckets categorized as sensitive, not sensitive, or not yet analyzed). This automated discovery runs in the background and drastically reduces the amount of data that needs full scanning by only inspecting a fraction of objects (thus saving time and cost).
- Targeted Data Discovery Jobs: For deeper analysis or specific use cases, you can run targeted sensitive data discovery jobs. With a job, you choose particular S3 buckets (and even specific prefixes or object tags) to scan and can run the job one-time or on a schedule. This is useful when you know exactly which data sets you want to inspect thoroughly – for example, scanning a bucket immediately after a security incident, or doing a weekly scan of a critical dataset. Macie’s jobs will scan the specified objects and report findings just like automated discovery, but under your direct control.
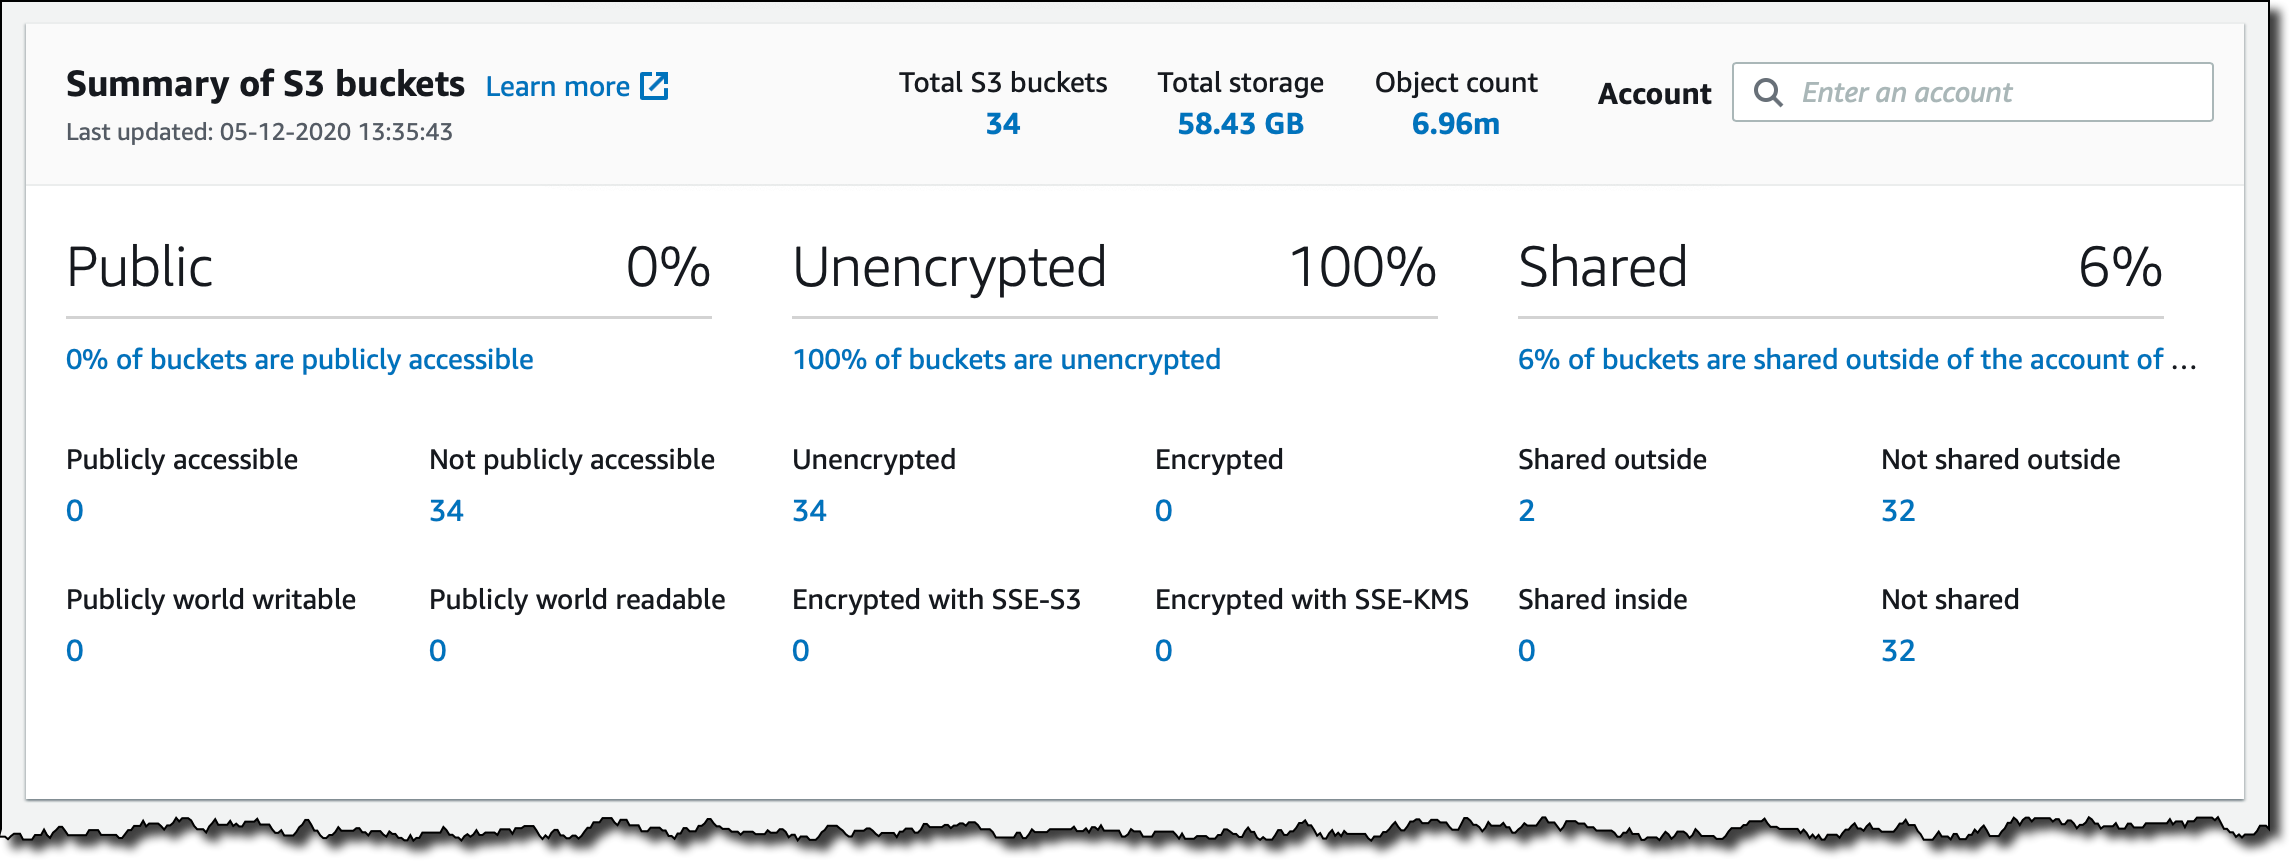
- S3 Bucket Inventory and Security Monitoring: Amazon Macie keeps an up-to-date inventory of your S3 buckets and continually evaluates their security configurations. It gathers details like bucket names, object counts, encryption settings, public access status, and so on . If Macie detects any bucket-level issue – such as a bucket becoming publicly readable or unencrypted – it generates a policy finding for you. This feature is like having a guardrail in place: it provides constant visibility into your S3 security posture and alerts on misconfigurations or drifts in settings.
- Managed and Custom Data Identifiers: Macie comes with a large set of managed data identifiers (built-in detectors) for sensitive data types: ranging from personal data (names, addresses, SSNs) to financial info (credit card, bank account numbers) to credentials (API keys, passwords). These allow Macie to recognize common patterns out-of-the-box. Additionally, you can define custom data identifiers using your own regular expressions. This means if you have proprietary sensitive data formats (say, internal account numbers or a custom customer ID pattern), you can teach Macie to detect those as well. Custom identifiers ensure Macie’s findings are tailored to what you consider sensitive.
- Integration with Other AWS Services: Findings from Macie don’t exist in a vacuum – they can be integrated into your broader security ecosystem. Macie can publish all findings to Amazon EventBridge (formerly CloudWatch Events) as they occur. This allows you to set up automated actions (for example, trigger an AWS Lambda function or send an SNS alert whenever Macie finds something). Macie also integrates with AWS Security Hub for centralized monitoring. If Security Hub is enabled, you can configure Macie to send its findings there, letting you aggregate and view Macie alerts alongside findings from other services like Amazon GuardDuty or AWS Config. This unified view is helpful for compliance audits and incident response, as Security Hub can show all your security findings across regions and accounts in one place.
With these features in hand, let’s walk through how to actually set up Amazon Macie in your AWS environment and start using it.
How to Set Up Amazon Macie
One of the great things about Amazon Macie is how quick it is to get started – there is no software to install or download on your end. Macie is a managed service that you enable within your AWS account. Below are the simple steps to set up Amazon Macie:
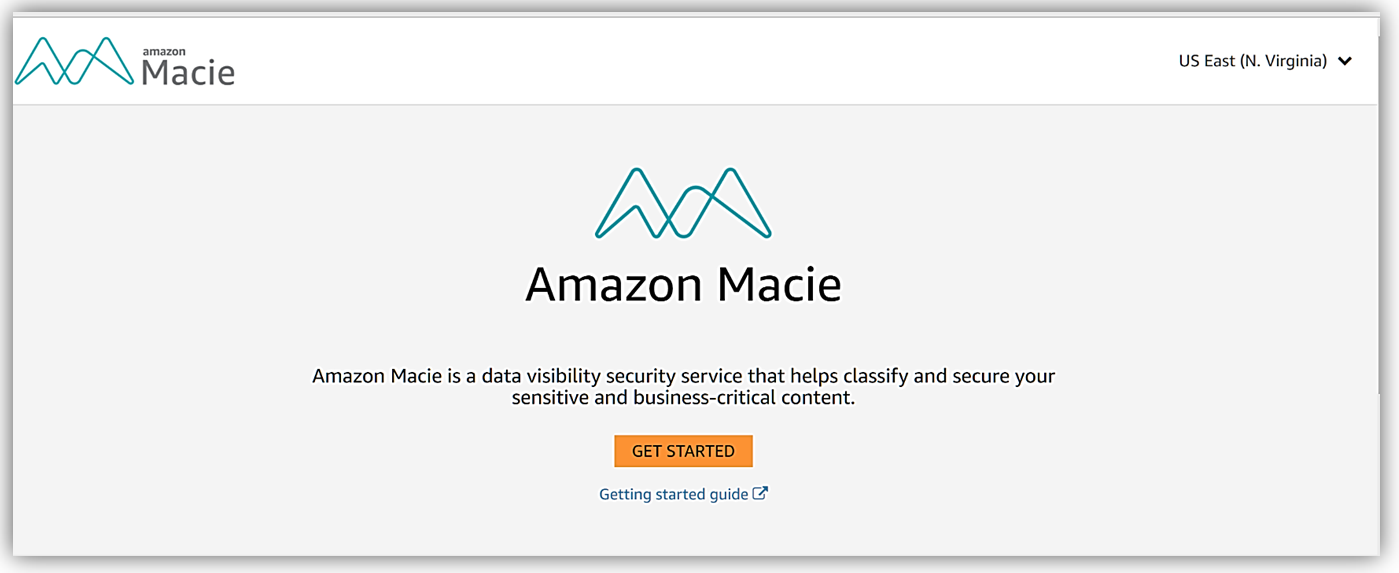
- Enable Macie in the AWS Console: Log in to the AWS Management Console and navigate to Amazon Macie. If it’s your first time, you’ll see a Get Started page. Choose “Enable Macie” (or “Get Started”) to activate the service . Macie must be enabled on a per-AWS-region basis (it’s a regional service) , so be sure to turn it on in each region where you have S3 data that you want to scan. Enabling Macie for the first time starts a 30-day free trial for that account/region, during which Macie’s core features won’t incur charges (more on the free trial in the pricing section).
- Macie Automatically Scans Your S3 Environment: Once enabled, Macie immediately begins scanning your S3 environment. It will inventory all your S3 buckets and start evaluating their security and access controls. Within minutes, Macie will generate a resource summary that includes the number of buckets, bucket-level details (public access, encryption status, etc.), and an initial snapshot of findings if any issues are found. At the same time, Macie kicks off its automated sensitive data discovery– it samples objects from your buckets and inspects them for sensitive data (like PII) continuously. You can watch the Macie dashboard populate with an interactive data map of your buckets and their sensitivity scores as this analysis progresses .
- Review and Configure Settings (Optional): After enabling Macie, you might want to review a few settings. In most cases, the defaults are fine – for example, automated discovery is on by default. If you are using AWS Organizations and have multiple accounts, you can designate a Macie administrator account to manage Macie across your org and enable Macie for member accounts with a few clicks, centralizing all findings . Macie also automatically created a service-linked IAM role in your account when you enabled it, named AWSServiceRoleForAmazonMacie. This role allows Macie to access your S3 buckets (and other necessary services) securely on your behalf, so you don’t need to manually set up any permissions. One setting to check is whether any of your S3 buckets use customer-managed KMS keys for encryption – if so, you may need to configure Macie to allow it to use those keys (Macie can decrypt objects encrypted with AWS-managed keys by default, but for customer-managed keys you must grant access). You can do this in the Macie console under Settings, ensuring Macie is allowed to use the KMS keys that protect your data.
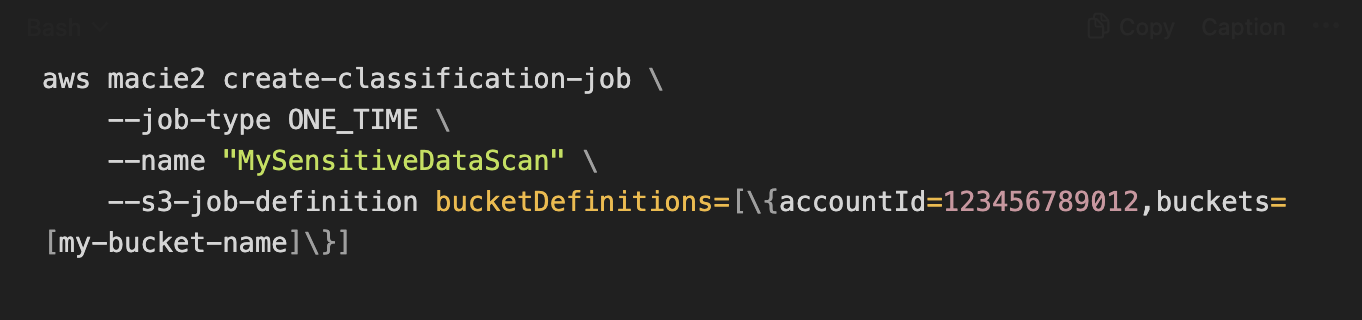
For those who prefer automation, you can also enable Macie via the AWS CLI or CloudFormation. For example, using the AWS CLI (version 2), you could run a command like:

The above CLI command achieves the same result as clicking “Enable Macie” in the console (here we specify the region us-east-1 and set status to ENABLED). Just ensure your IAM user/role has permission to enable Macie. AWS provides a managed policy called AmazonMacieFullAccess that grants full Macie administration rights, including the ability to create the service-linked role needed to activate Macie. Attaching that policy to your IAM role will allow you to set up Macie without permission issues.
How to Use Amazon Macie for Data Discovery
After you’ve set up Amazon Macie, using it effectively comes down to understanding its findings and optionally running targeted jobs for specific needs. Let’s break down the typical ways to use Macie in your day-to-day cloud security workflow:
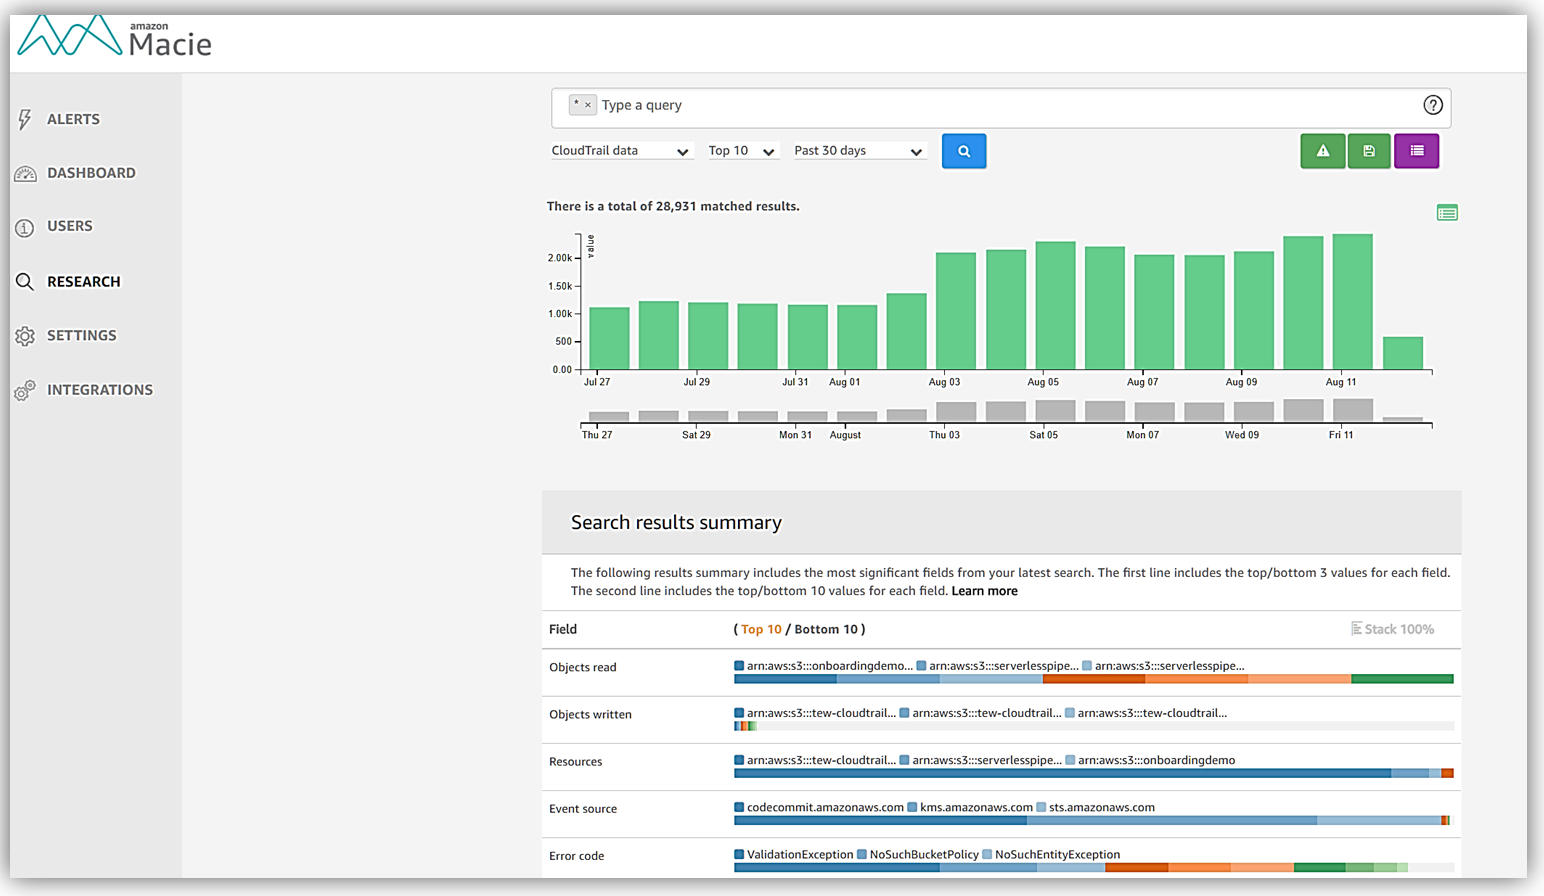
- Monitoring the Macie Dashboard: The Macie console provides a dashboard overview of your S3 data security posture. Here you’ll see stats like how many buckets you have, how many of them are public or unencrypted, and a summary of sensitive data findings detected . A highlight of the dashboard is the data sensitivity heat map (if automated discovery is enabled) which visually identifies buckets with potential sensitive data. Use this as a starting point – for example, if you see a bucket flagged with a high sensitivity score, you’ll want to click into it and review what Macie found.
- Reviewing Macie Findings: When Macie detects something notable – be it sensitive data in an object or a policy issue with a bucket – it generates a finding. In Macie, a finding is essentially a detailed alert or report. Each finding will tell you what was discovered (e.g., “Sensitive data – credit card numbers – found in S3 object X” or “Bucket XYZ is publicly accessible”), where it was found (bucket name and object key or bucket settings), when it was found, and a severity level . You can browse all findings in the Macie console under the Findings section. The console allows filtering and sorting findings by criteria like severity, type, bucket name, etc., which helps in triaging issues. For example, you might filter to see all sensitive data findings of type PII versus any policy-related findings. Each finding can be expanded to show more details, including sample excerpts of the sensitive data detected (e.g., the actual text that matched a PII pattern) and a recommendation for mitigation.
- Automating Response to Findings: Many organizations integrate Macie findings into their incident response or compliance workflows. As mentioned, Macie automatically sends events to Amazon EventBridge for each finding. This means you can create rules to trigger actions when certain findings occur. For instance, you could configure an EventBridge rule that triggers an AWS Lambda function whenever Macie reports a finding of high severity. That Lambda could, say, automatically tag the affected S3 object, send a notification to your security team, or even initiate remediation (like quarantining the object or adjusting bucket policies if a bucket is public). Additionally, by forwarding findings to AWS Security Hub , you can use Security Hub’s aggregation and alerting features – Security Hub can aggregate Macie findings across multiple accounts/regions, deduplicate them, and even generate summary insights or compliance checks (Macie has a related Security Hub control that checks if Macie itself is enabled in required accounts ). In short, Macie’s value increases when you integrate it with these broader AWS security tools, enabling a more automated and scalable response.
- Running Targeted Discovery Jobs: While automated discovery gives a continuous overview, you may have scenarios where you want to manually scan specific data in depth. For example, imagine you must scan an entire bucket that belonged to a now-archived project to ensure no sensitive data was left behind. In the Macie console, you can create a sensitive data discovery job for this. This involves selecting the target buckets (and optional filters like only certain file types or only objects with specific tags), choosing if it’s a one-time job or a recurring job, and then running it. Macie will then inspect all (or a specified sample) of objects in those buckets and produce findings just like the automated process, but scoped to your job. You might run one-time jobs on high-value datasets or set up a scheduled job to regularly scan new objects in a critical bucket (e.g., run daily on the “uploads” bucket to catch sensitive info quickly). For those who prefer CLI or infrastructure-as-code, you can also start jobs via AWS CLI. For example, via CLI a simplified one-time job command could look like:
Using Amazon Macie becomes a cycle of enable → review findings → take action → repeat. After the initial setup and possibly some one-time scans, many teams integrate Macie’s outputs into their security review processes (monthly compliance checks, incident response drills, etc.). The key is that Macie continuously watches your S3 data, so you’ll be alerted to sensitive data exposures or bucket misconfigurations that otherwise could go unnoticed until it’s too late.
Amazon Macie Pricing and Free Tier
Like most AWS services, Amazon Macie’s cost is based on usage. Understanding the Amazon Macie pricing model will help you anticipate costs as you scale up your data discovery efforts. Macie pricing is determined by three main dimensions:
- Number of S3 buckets monitored: Macie charges for the count of S3 buckets that it continually monitors for inventory and security posture. When you enable Macie, it will identify all your S3 buckets and begin monitoring their metadata (names, size, tags, encryption settings, public access, etc.) . The first 10,000 buckets are typically included in the baseline monitoring charge (beyond that threshold, check the pricing page for how additional buckets are handled) . This bucket count is calculated after any free trial period and prorated by day. Essentially, if you have (for example) 100 buckets in your account, you’ll pay a small monthly fee for Macie to keep an eye on those 100 buckets’ configurations.
- Number of objects monitored for automated data discovery: This charge relates to Macie’s continual sampling of objects for its automated sensitive data discovery feature. Macie will assess all objects across your buckets to determine which ones to sample (clustering them by type, prefix, etc., as described earlier) . You are billed based on the total number of objects in your S3 that are being considered for automated scanning. This is also prorated daily and kicks in after the free trial. If objects are deleted, or new objects added, the count adjusts – Macie keeps track of object count changes over time . In short, think of this as a charge for the scale of your data estate that Macie is keeping tabs on for automated analysis.
- Amount of data scanned for sensitive data discovery: This is usually the largest factor in Macie costs. It covers the volume of data actually inspected for sensitive content, measured in bytes. This includes data scanned by both automated discovery and any targeted discovery jobs you run . For automated discovery, Macie’s smart sampling means it scans a fraction of your total data – which saves costs compared to scanning everything. For targeted jobs, you have more control: you pay for exactly the amount of data those jobs inspect (plus any standard S3 request fees for object retrieval) . Macie only charges for supported object types it can actually scan (if it skips an unsupported file type, you don’t pay for that). If you scan 50 GB of data in a month, you pay for 50 GB at the rate for your region. The pricing page provides rates per GB, which differ slightly by region.
30-Day Free Trial: When you first enable Macie in an account, AWS gives you a free trial for 30 days. During this period, Macie’s automated data discovery and bucket monitoring are provided at no cost. The free trial includes up to 150 GB of data scanning at no charge. Note that if you run any targeted jobs during the trial, those jobs’ data may not be covered by the free trial (the free trial mainly covers the automated discovery). After the 30 days, billing for the above dimensions will start. AWS also offers an ongoing Free Tier for Macie after the trial: as of this writing, Macie includes 1 GB of data processed for sensitive data discovery per account per month at no cost. This free tier is useful if your data scanning needs are very light or intermittent – small jobs up to 1 GB monthly won’t incur charges even long after the trial has ended.
To give a practical perspective, consider a scenario: You enable Macie on an account with 20 buckets containing 100,000 total objects, and Macie ends up scanning 50 GB of data in a given month. Your cost for that month would consist of the bucket monitoring fee for 20 buckets, the object monitoring fee for 100,000 objects, and the data scanning fee for 50 GB. Macie’s pricing is designed such that if you only have a few buckets or only scan a small amount of data, the cost remains low. If you have a very large S3 footprint (millions of objects, terabytes of data), Macie’s automated discovery helps target the most relevant data to scan (reducing the total bytes scanned) to keep the process cost-efficient.
Always refer to the official Amazon Macie pricing page for the latest pricing details and use the AWS Pricing Calculator to estimate costs for your specific use case.
Conclusion
Amazon Macie provides a powerful yet approachable solution for a critical cloud security challenge: knowing where your sensitive data is and making sure it’s protected. In this article, we’ve answered what is Amazon Macie – it’s AWS’s managed service for sensitive data discovery and data security in S3. We’ve also walked through how to set up Amazon Macie (it’s as easy as enabling the service in your AWS Console, with no downloads or installations) and how to use Amazon Macie to continuously monitor your S3 buckets, discover sensitive information, and respond to potential risks. With features like automated data discovery, detailed findings, and integrations with Security Hub and EventBridge, Macie acts as an ever-vigilant data guardian in your cloud environment.
Before we wrap up, it’s worth noting that Amazon Macie is one piece of a broader cloud security strategy. Macie specifically focuses on S3 data. To round out your security posture, consider using it alongside other AWS services: for example, Amazon GuardDuty for threat detection, AWS Config for configuration compliance, and Security Hub to tie it all together. Macie feeds into this ecosystem by covering the data discovery angle – highlighting where your sensitive data is and if it’s exposed – something that other services don’t do deeply. By taking Macie’s findings and acting on them (restricting access to a bucket, encrypting objects, removing sensitive data that shouldn’t be in S3, etc.), you significantly reduce the risk of data breaches and compliance violations.
Optimize Your Cloud Expenses with Cloudchipr
Setting up AWS Macie is only the beginning—actively managing cloud spend is vital to maintaining budget control. Cloudchipr offers an intuitive platform that delivers multi‑cloud cost visibility, helping you eliminate waste and optimize resources across AWS, Azure, and GCP.
Key Features of Cloudchipr
Automated Resource Management:
Easily identify and eliminate idle or underused resources with no-code automation workflows. This ensures you minimize unnecessary spending while keeping your cloud environment efficient.
Receive actionable, data-backed advice on the best instance sizes, storage setups, and compute resources. This enables you to achieve optimal performance without exceeding your budget.
Keep track of your Reserved Instances and Savings Plans to maximize their use.
Monitor real-time usage and performance metrics across AWS, Azure, and GCP. Quickly identify inefficiencies and make proactive adjustments, enhancing your infrastructure.
Take advantage of Cloudchipr’s on-demand, certified DevOps team that eliminates the hiring hassles and off-boarding worries. This service provides accelerated Day 1 setup through infrastructure as code, automated deployment pipelines, and robust monitoring. On Day 2, it ensures continuous operation with 24/7 support, proactive incident management, and tailored solutions to suit your organization’s unique needs. Integrating this service means you get the expertise needed to optimize not only your cloud costs but also your overall operational agility and resilience.
Experience the advantages of integrated multi-cloud management and proactive cost optimization by signing up for a 14-day free trial today, no hidden charges, no commitments.